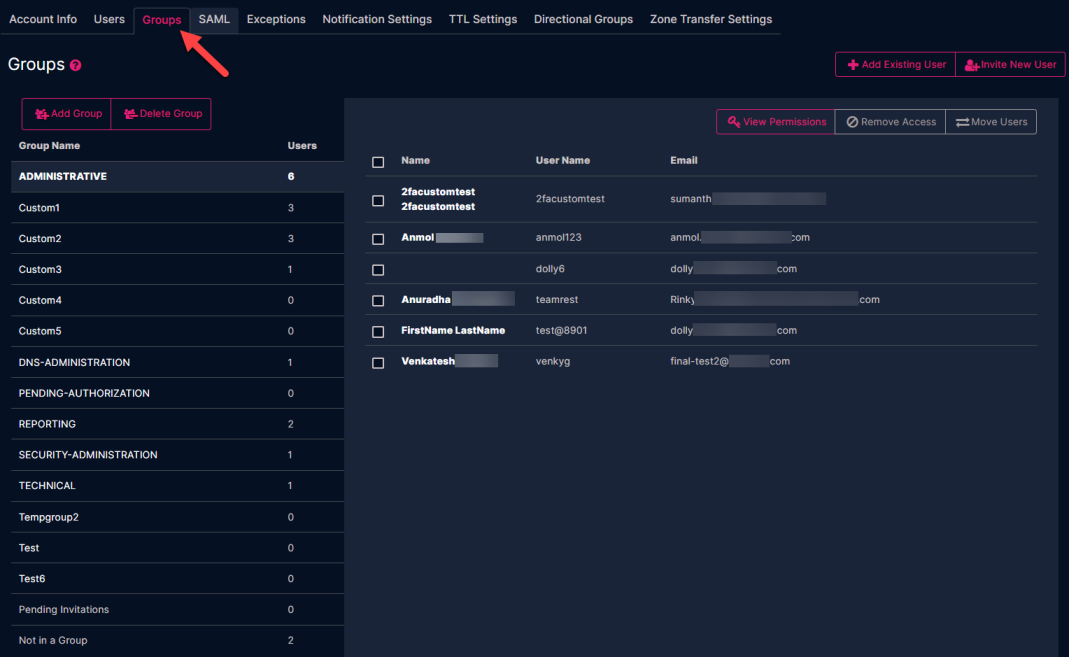
The Groups section displays the organizational groups you have created for your account, the system generated groups, as well as any users that have been created or invited to join the UI Portal in association to your account.
Please note that users can only belong to a single group at a time.
System Generated Groups and Permissions
-
ADMINISTRATIVE - The users belonging to this group will have full administrative privileges for the account and can perform any action that will update or impact account level details, as well as any users in the account, except for the Owner.
-
DNS-ADMINISTRATION - Users belonging to this group can perform all DNS configured operations, as well as managing Group configuration and management, but cannot update User details or the Security Preferences details.
-
PENDING-AUTHORIZATION - A group that is created only for SAML enabled accounts that have opted into the security feature, and are waiting for their account administrator to move them to a designated group.
-
REPORTING - The users belonging to this group will have the basic READ permission, preventing them from performing any operation that would modify the state of an object in the account.
-
SECURITY-ADMINISTRATION - The users belonging to this Security Group will be able to perform all the operations at the DNS and account level These users are restricted to only retrieving details at the group level, meaning they cannot perform any additional operations at the group level.
-
TECHNICAL - The users belonging to this group will be able to perform all the operations at the DNS level but are restricted from performing any operation associated to Account Management.
-
Pending Invitations - Users in this group have been invited to join a group, but have not yet accepted the invitation via the email they were sent.
-
Not in a Group - Users in this group have not yet been assigned to any group, and will only have basic READ permission across the entire portal.
Add Group
To add a new group to your account:
-
Click the Add Group button.
-
Provide a Group Name.
-
Click Save.
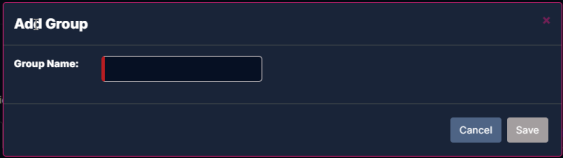
Your new group will be listed in the Group Name list on the left-hand side of the screen.
Invite Users (to a Group)
To invite users (to a group) on the UI Portal:
-
Click on the group name from the list on the left-hand side of the screen.
-
Any existing users will be listed in the middle of the screen.
-
-
Click the Invite User button in the upper right-hand section of the screen.
-
Select the appropriate Account name from the Invite to Account drop-down menu.
-
Select the group you want to assign the user to from the Assign to Group drop-down menu.
-
If the new user should only have access to the API, click in the check box for API only access.
-
-
Provide the email address(es) for the user(s) you wish to add to the group.
-
Multiple email addresses should be comma separated.
-
-
Click the Invite button when you are finished.
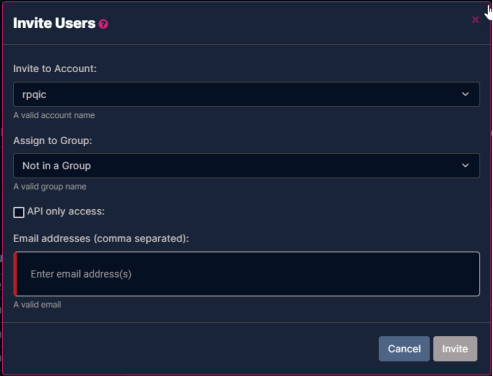
Once a new user is successfully added to the new account, their email address will automatically be subscribed to receive notifications for UltraDNS system incidents and maintenance activity. The status dashboard details can be found in the Service Status section of this guide.
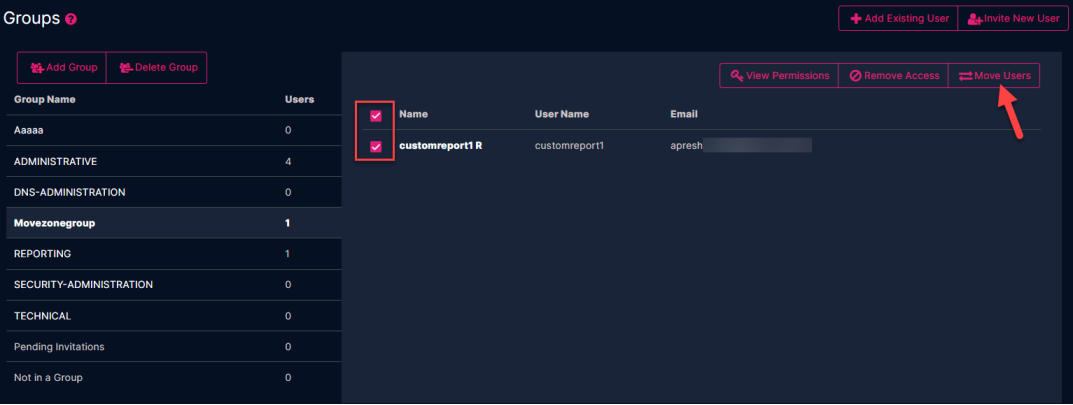
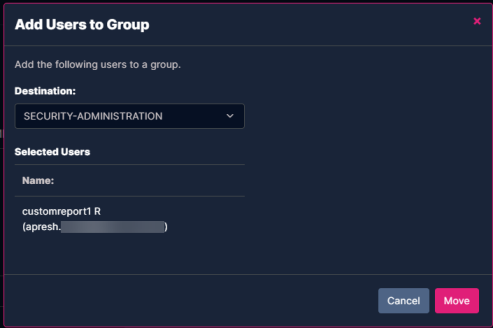
Moving Users to Groups
To move an existing user to a new group:
-
Select the group from the list of available group names that the user is currently assigned to.
-
Click the check box next to the user's name.
-
Click the Move Users button.
-
Select the Destination using the drop-down menu to select the new group to move the user to.
-
Click the Move button to move the user to the new group.
Pending Authorization
The Pending Authorization group is a custom group that is created only for SAML enabled accounts that have opted into the security feature. Users in this group will not have any permissions or access to the Managed Services Portal until an account administrator moves them to a selected security group. Additionally, users cannot be moved into this custom group.
For more details on this feature, refer to the Pending Authorization section, or reach out to Customer Support.
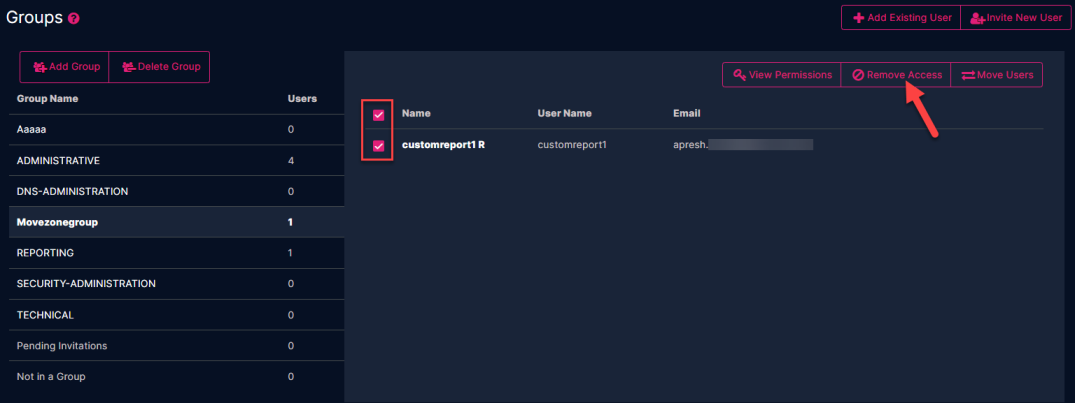
Removing Access to a Group
To remove a user's access to a group:
-
Select the group that the user currently belongs to.
-
Click the check box next to the user's name.
-
Click the Remove Access button.
-
Confirm you want to remove the user from the group by clicking the Remove button.
IMPORTANT: Once removed, the designated user will no longer have access to the group.
Once a user is removed, their email address for notification settings will be automatically be unsubscribed from receiving any further UltraDNS system notifications.
Deleting a Group
To delete a group from the UI portal:
-
Click the Delete Group button.
-
Select the group name from the drop-down menu (if there are any that are able to be deleted).
-
Confirm the deletion of the group by clicking the Delete button.
-
Any users associated with the group will automatically lose their access to the group.
-